The Mardi Himal trek is moderately difficult, demanding reasonable cardiovascular fitness, leg strength, and mental preparation but no technical climbing skills or previous high-altitude experience. The primary challenges are sustained uphill walking across consecutive days, the pre-dawn climb to Upper Viewpoint at 4,200 meters, and the long, knee-straining descent to Siding village. Merriment Treks assesses this trek as achievable for most reasonably fit individuals who train appropriately and select an itinerary that matches their fitness level.
Merriment Treks has written this guide because most difficulty assessments online fail you. They label the trek “moderate” without explaining what that means for your legs, lungs, and daily energy. They tell you the trek is achievable without telling you which days will test you. They omit the descent entirely. They ignore altitude education. This guide fixes those failures.
How difficult is Mardi Himal trek? The honest answer is that it depends on your fitness, your itinerary choice, the season, and your mental preparation. A reasonably fit person on the 6-day itinerary in autumn will find this trek challenging but deeply rewarding. A sedentary person on the 4-day itinerary in winter will find it punishing. The difference is preparation and honest self-assessment.
This guide explains exactly what makes the Mardi Himal trek difficult, which sections are hardest, how altitude affects your body, how to train effectively, and how to choose an itinerary that fits your capabilities. Merriment Treks will not tell you this trek is easy. We will tell you it is achievable for most people who respect the demands and prepare accordingly.
What “Moderate Difficulty” Actually Means for Mardi Himal
When trekking companies describe the Mardi Himal trek as “moderate difficulty,” they mean the trail involves 3-8 hours of walking daily on uneven terrain with significant elevation gain, but no technical climbing, glacier crossing, or extreme altitude exposure. This is a walking trek, not a mountaineering expedition.
However, “moderate” is a meaningless label without context. For a regular hiker with good fitness, Mardi Himal will feel manageable. For someone who is sedentary and has never hiked on uneven terrain, the same trek will feel genuinely difficult. The label hides more than it reveals.
Merriment Treks defines the actual difficulty of the Mardi Himal trek in these specific terms:
What the trek demands:
-
Daily walking of 3-8 hours depending on the specific day
-
Cumulative elevation gain of approximately 2,400 meters from Kande to Upper Viewpoint
-
Uneven trails with rocks, roots, stone steps, and occasional mud
-
Highest sleeping elevation of 3,580 meters at High Camp
-
Highest daytime elevation of 4,200 meters at Upper Viewpoint or 4,500 meters at Base Camp
-
No technical climbing or specialized equipment
-
3-5 consecutive trekking days without rest days
What the trek does not demand:
-
No mountaineering skills
-
No glacier crossing
-
No fixed ropes or harnesses
-
No extreme altitude (above 5,000 meters)
-
No camping (teahouse accommodation throughout)
The key distinction is that the Mardi Himal trek is physically demanding but technically simple. The challenge comes from cardiovascular endurance and leg strength, not from climbing skill or fear management.
The Real Difficulty Factors of the Mardi Himal Trek
The difficulty of the Mardi Himal trek comes from several combined factors rather than any single extreme demand. Understanding these factors helps you prepare effectively and manage expectations.
Sustained Uphill Elevation Gain
The Mardi Himal trek involves climbing approximately 2,430 meters from Kande at 1,770 meters to Upper Viewpoint at 4,200 meters over 3-4 days. This elevation gain is substantial but spread across multiple days, making it manageable rather than overwhelming for most trekkers.
The steepest sustained climbs occur on two specific sections. The first day from Kande to Forest Camp gains approximately 750 meters over 5-6 hours. This is a long, steady climb that tests your cardiovascular endurance on the first day when your body is still adjusting to trekking.
The final morning climb from High Camp to Upper Viewpoint gains 620 meters over just 2 kilometers. This is a steep, demanding climb made harder by pre-dawn darkness, cold temperatures, and the altitude at which it occurs.
Daily Walking Duration
Typical walking days on the Mardi Himal trek range from 3 to 8 hours depending on your itinerary and the specific day. The shortest day in the 5-day itinerary is the Forest Camp to Low Camp section, taking 3-4 hours. The longest day combines the High Camp to Upper Viewpoint sunrise climb with the descent to Siding, totaling 6-8 hours.
Walking duration matters because fatigue compounds. A 3-hour day feels pleasant and leaves energy for enjoying the views. A 6-hour day feels tiring but manageable. An 8-hour day feels exhausting and leaves little energy for anything beyond arriving at your destination.
The itinerary you choose determines how these hours are distributed. The 6-day itinerary breaks longer days into shorter segments. The 4-day itinerary combines segments, creating longer, more demanding days.
Steep Sections and Stone Steps
The Mardi Himal trail includes several notably steep sections and extensive stone steps. These features provide stable footing but create repetitive muscle strain that accumulates over hours of walking.
Stone steps are particularly demanding on knees during descent. Each step downward sends impact through the knee joint. Over thousands of steps during the descent from High Camp to Siding, this impact can cause significant discomfort for trekkers with existing knee issues or inadequate preparation.
The steep sections require sustained leg strength. The initial climb from Kande to Australian Camp is immediately steep. The final climb from High Camp to Upper Viewpoint is steep enough to require frequent rest breaks at altitude.
Uneven Terrain
The Mardi Himal trail is not a smooth, groomed path. It features rocks, roots, mud during wet seasons, and varying surfaces throughout. This uneven terrain requires constant attention to foot placement and engages stabilizing muscles in ankles, knees, and hips.
The mental fatigue of navigating uneven terrain is often underestimated. After several hours of watching where you step, mental fatigue compounds physical fatigue. Trekkers who are new to trail walking find this more exhausting than expected.
Downhill Walking and the Siding Descent
The descent from High Camp to Siding involves losing over 1,800 meters of elevation in a single day. This descent is often harder on the body than any uphill section of the trek.
Downhill walking creates eccentric muscle contractions—muscles lengthen while under tension—which cause more muscle damage and soreness than uphill walking. The impact on knees, ankles, and quadriceps is significant. Many trekkers report that the descent, not the climb, is the hardest part of the Mardi Himal trek.
The descent is also mentally demanding. Constant attention to foot placement on steep, uneven terrain for 4-6 hours requires sustained concentration. Trekking poles are essential for this section, reducing strain on knees and providing stability.
Altitude Effects
The highest sleeping elevation on the Mardi Himal trek is High Camp at 3,580 meters. The maximum daytime elevation is Upper Viewpoint at 4,200 meters or Base Camp at 4,500 meters.
At these elevations, the air contains 60-65% of the oxygen available at sea level. Your body must work harder to obtain the oxygen it needs. Breathing feels more labored, and physical effort feels more demanding. Some trekkers experience headaches, fatigue, loss of appetite, or difficulty sleeping at these altitudes.
Altitude affects individuals differently and unpredictably. Fitness level does not prevent altitude sickness. The itinerary duration significantly affects altitude risk: the 5-day itinerary follows recommended altitude progression guidelines, while the 4-day itinerary increases risk through rapid ascent.
Weather and Cold
Weather conditions significantly affect the difficulty of the Mardi Himal trek. Rain creates mud and slippery trails. Cold at High Camp makes mornings uncomfortable and requires proper gear. Wind on exposed ridges adds physical strain. Snow in winter changes trail conditions entirely.
The pre-dawn climb from High Camp to Upper Viewpoint occurs in the coldest part of the day. Temperatures can be below freezing, especially in winter and early spring. This cold adds discomfort and requires proper layers.
Consecutive Trekking Days
The Mardi Himal trek requires 3-5 consecutive days of walking depending on your itinerary. This is fundamentally different from day hiking. Your body must recover overnight and continue walking the next day.
Cumulative fatigue builds over the trek. The third day feels harder than the first, even when the terrain is similar. Your legs may feel heavy. Your energy may be lower. This is normal, but it requires mental preparation.
Individual Fitness
The most important factor affecting difficulty is your individual fitness level. Trekkers with good cardiovascular fitness and leg strength will find the Mardi Himal trek manageable. Trekkers who are sedentary will struggle significantly.
The good news is that fitness can be improved with preparation. The training section later in this guide provides specific recommendations. The key is starting training early enough to build the endurance and strength needed for consecutive trekking days.
Difficulty by Trekking Stage: Day-by-Day Breakdown
Understanding the difficulty of each trekking stage helps you prepare mentally and physically. The table below shows the difficulty for each stage of the standard 5-day itinerary.
| Stage | Approx. Walking Demand | Terrain | Altitude Impact | Difficulty | Main Challenge |
|---|---|---|---|---|---|
| Kande to Forest Camp | 5-6 hours | Uphill trail, stone steps, forest path | Minimal (below 3,000m) | Moderate | First day adjustment, sustained uphill |
| Forest Camp to Low Camp | 3-4 hours | Forest trail, steady climb | Moderate (approaching 3,000m) | Easy | Shortest day, pleasant walking |
| Low Camp to High Camp | 3-5 hours | Mixed terrain, exposed ridge | Significant (3,000-3,580m) | Moderate | Altitude noticeable, wind exposure |
| High Camp to Upper Viewpoint | 1-1.5 hours | Steep uphill, rocky | High (3,580-4,200m) | Strenuous | Pre-dawn cold, steep climb |
| High Camp to Siding | 4-6 hours | Steep downhill, uneven | Decreasing (3,580-1,750m) | Difficult | Knee strain, long descent |
Important Note: The table above reflects the standard 5-day itinerary. The 6-day itinerary splits some stages into shorter segments, reducing daily difficulty. The 4-day itinerary combines stages, increasing daily difficulty.
The Single Hardest Day
The hardest day of the Mardi Himal trek is Day 4 of the standard 5-day itinerary, which combines the pre-dawn climb to Upper Viewpoint with the subsequent descent to Siding. This day is difficult because it layers multiple challenges:
-
4:00 AM wake-up — Physically disruptive and mentally demanding
-
Pre-dawn climb in darkness — 620 meters of elevation gain in 2 kilometers
-
Cold temperatures — Below freezing in winter and early spring
-
Altitude at 4,200 meters — Breathing noticeably harder
-
Emotional intensity of sunrise — Awe-inspiring but draining
-
No rest before descent — Breakfast at High Camp, then immediate descent
-
Long descent to Siding — 4-6 hours of downhill walking
-
Cumulative fatigue — Fourth consecutive trekking day
-
Total walking time — 6-8 hours
This day is genuinely demanding. However, on the 5-day and 6-day itineraries, proper acclimatization over the previous days makes it manageable. On the 4-day itinerary, this same day becomes punishing due to inadequate recovery and acclimatization.
Altitude and Acclimatization on the Mardi Himal Trek
Altitude is the factor that most concerns potential trekkers, and it deserves honest, accurate explanation. The highest sleeping elevation on the Mardi Himal trek is High Camp at 3,580 meters. The maximum daytime elevation is Upper Viewpoint at 4,200 meters or Base Camp at 4,500 meters.
What Altitude Does to Your Body
At sea level, the air pressure allows your lungs to efficiently transfer oxygen to your blood. At 3,580 meters (High Camp), the air pressure is significantly lower, meaning there are fewer oxygen molecules in each breath. Your body receives approximately 65% of the oxygen it would receive at sea level.
Your body responds to this reduced oxygen by increasing breathing rate, increasing heart rate, producing more red blood cells over days, and shifting blood flow to vital organs. These adaptations take time, which is why gradual ascent and proper acclimatization are important.
Common Altitude Symptoms
Mild symptoms (common and usually not serious):
-
Headache
-
Fatigue
-
Loss of appetite
-
Difficulty sleeping
-
Mild nausea
More serious symptoms (require immediate attention):
-
Persistent headache not relieved by medication
-
Vomiting
-
Confusion
-
Difficulty breathing at rest
-
Loss of coordination
Why Fitness Does Not Prevent Altitude Sickness
Physical fitness does not prevent altitude sickness. The body’s ability to adapt to altitude is largely individual and cannot be predicted by fitness level. Elite athletes can experience altitude sickness while less fit individuals sometimes acclimatize well.
This is one of the most important things to understand about altitude. Being fit does not mean you are immune to altitude illness. Being unfit does not mean you will definitely get sick. The only reliable strategy is proper acclimatization through gradual ascent.
How Itinerary Choice Affects Altitude Risk
The itinerary duration significantly affects altitude risk on the Mardi Himal trek:
4-Day Itinerary: Rapid ascent to High Camp increases altitude risk. The body has less time to acclimatize before sleeping at 3,580 meters. This violates recommended altitude progression guidelines.
5-Day Itinerary: Follows recommended altitude progression guidelines. Sleep altitude gain above 3,000 meters is limited to approximately 530 meters per day, within the recommended 300-500 meter range.
6-Day Itinerary: Provides the most gradual altitude progression. The body has maximum time to acclimatize before High Camp. This exceeds recommended guidelines for safety.
When to Tell Your Guide
Tell your guide immediately if you experience any altitude symptoms. Your guide is trained to assess the severity of symptoms and make appropriate recommendations. Do not hide symptoms out of fear of disappointing your group. Altitude symptoms are common and expected. Your guide has managed altitude issues many times before.
When Descent Is Necessary
Descent is the definitive treatment for altitude sickness. If symptoms are severe or worsening despite rest and medication, descent to lower elevation is necessary.
Descending due to altitude sickness is not a failure. It is a safety decision that every responsible trekker should accept. The mountain will still be there another time.
Can a Beginner Complete the Mardi Himal Trek?
Yes, a beginner with reasonable fitness and proper preparation can complete the Mardi Himal trek, especially on the 6-day itinerary. This trek is one of the best options for first-time Himalayan trekkers.
What “Beginner” Means
For clarity, Merriment Treks defines a beginner as:
-
Someone who has never trekked in the Himalayas
-
Someone who may have done day hikes but no multi-day treks
-
Someone who exercises regularly but is not an athlete
-
Someone willing to train before the trek
What “Beginner” Does Not Mean
A beginner is not:
-
Someone who is completely sedentary
-
Someone with significant health issues
-
Someone unwilling to train
-
Someone expecting an easy walk
Why Mardi Himal Works for Beginners
Mardi Himal is suitable for beginners because:
-
Short duration — 5-6 days is manageable for a first trek
-
Moderate altitude — Maximum sleeping elevation of 3,580 meters is significant but not extreme
-
Teahouse accommodation — No camping required
-
Well-defined trail — The route is clear and well-traveled
-
No technical sections — No climbing or glacier crossing
-
Gradual progression — The 6-day itinerary provides gentle progression
-
Licensed guide support — Merriment Treks provides experienced guides
-
Porter option available — Reduces backpack weight
What Beginners Should Do Differently
If you are a beginner, Merriment Treks recommends:
-
Choose the 6-day itinerary rather than the 5-day option
-
Start training at least 8 weeks before your trek
-
Hire a porter if you are concerned about carrying weight
-
Be honest with your guide about your fitness level
-
Walk slowly and do not try to keep up with others
-
Communicate symptoms immediately
-
Consider a private trek for personalized pacing
When a Beginner Should Reconsider
If you fall into any of these categories, reconsider whether the Mardi Himal trek is right for you:
-
You are completely sedentary and unwilling to train
-
You have significant knee problems
-
You have heart or respiratory conditions (consult your doctor)
-
You are significantly overweight
-
You have no experience walking on uneven terrain
-
You are uncomfortable with basic outdoor activities
How Fit Do You Need to Be? A Practical Self-Assessment
You do not need to be an athlete to complete the Mardi Himal trek, but you do need reasonable cardiovascular fitness and leg strength. Use this self-assessment to evaluate your current readiness honestly.
Cardiovascular Endurance
Good indicators you are ready:
-
You can walk briskly for 60+ minutes without stopping
-
You can climb 20+ flights of stairs without becoming breathless
-
You exercise at moderate intensity 3+ times per week
-
You can maintain a conversation while walking uphill
Warning signs you need more training:
-
You become breathless after 10 minutes of brisk walking
-
You cannot climb 5 flights of stairs without stopping
-
You are sedentary most days
-
You experience chest pain or severe shortness of breath with exercise
Leg Strength
Good indicators you are ready:
-
You can do 20+ bodyweight squats comfortably
-
You can walk downhill without knee pain
-
You regularly walk on uneven surfaces
-
Your legs recover within 24 hours after exercise
Warning signs you need more training:
-
You experience knee pain during normal walking
-
You struggle with stairs
-
You have weak ankles
-
You have not exercised your legs in months
Uphill Hiking
Good indicators you are ready:
-
You have hiked uphill trails before
-
You understand pacing and breathing on climbs
-
You can maintain steady effort for 2+ hours
Warning signs you need more training:
-
You have never hiked uphill
-
You become exhausted quickly on hills
-
You cannot maintain steady effort for 30 minutes
Downhill Tolerance
Good indicators you are ready:
-
You can walk downhill without significant knee pain
-
You understand the importance of trekking poles
-
Your quadriceps do not fatigue excessively on descents
Warning signs you need more training:
-
You experience knee pain on stairs
-
You have previous knee injuries
-
You have never walked downhill for extended periods
Consecutive Walking Days
Good indicators you are ready:
-
You have completed multi-day hikes before
-
You can walk for multiple consecutive days without injury
-
You understand recovery needs
Warning signs you need more training:
-
You have never walked for more than one day consecutively
-
You become very sore after a single day of walking
-
You have chronic pain that worsens with activity
Important Disclaimer
This self-assessment is a practical guide, not a medical evaluation. If you have any health concerns, consult your doctor before booking the trek. Some medical conditions may make high-altitude trekking inadvisable.
Training for Mardi Himal: What Actually Works
Proper training makes the difference between enjoying the Mardi Himal trek and merely surviving it. You do not need a complex training plan, but you do need consistent preparation starting at least 8 weeks before your trek.
Training Timeline
8-12 Weeks Before Trek:
Begin regular cardiovascular exercise 3-4 times weekly. Focus on building endurance through brisk walking, cycling, swimming, or elliptical training. Start with 30-45 minutes per session and gradually increase to 60+ minutes.
4-8 Weeks Before Trek:
Add hill and stair training to your routine. Find local hills or stairs and practice climbing them regularly. Start with 10 flights of stairs or 30 minutes of hill walking and progress gradually.
2-4 Weeks Before Trek:
Practice with a loaded daypack on hills and stairs. Start with 3-4 kilograms and progress to 5-7 kilograms. This prepares your body for the weight you will carry on the trek.
1-2 Weeks Before Trek:
Taper your training. Reduce intensity and duration to allow your body to rest and recover before the trek. Focus on stretching, hydration, and sleep.
Cardiovascular Conditioning
Goal: Build endurance for sustained walking
Recommended Activities:
-
Brisk walking (45-60 minutes, 3-4 times weekly)
-
Cycling (moderate intensity)
-
Swimming
-
Elliptical training
-
Jogging (if comfortable)
Progression: Gradually increase duration and intensity over weeks. The goal is to walk briskly for 60+ minutes without stopping.
Hill and Stair Training
Goal: Prepare legs for sustained climbing
Recommended Activities:
-
Hike local hills or trails
-
Walk uphill routes in your area
-
Use treadmill incline (8-15% grade)
-
Climb stairs in your building or local stadium
-
Start with 10 flights, progress to 30+ flights
-
Add weight (backpack) gradually
Progression: Increase hill duration and steepness gradually. The goal is to climb for 2+ hours without exhaustion.
Strength Training
Goal: Build leg, core, and back strength
Recommended Exercises:
-
Squats (bodyweight or weighted)
-
Lunges
-
Step-ups
-
Calf raises
-
Core exercises (planks, bridges)
-
Back exercises (rows, deadlifts with proper form)
Progression: Increase repetitions and resistance gradually. The goal is functional strength for walking, not bodybuilding.
Downhill Training
Goal: Prepare knees and quadriceps for descent
Recommended Activities:
-
Walk downhill on local hills
-
Practice controlled descent
-
Use trekking poles
-
Focus on knee tracking and stability
Progression: Increase downhill duration gradually. The goal is to descend for 2+ hours without significant knee pain.
Rest and Recovery
Rest is as important as training. Your body needs time to adapt and strengthen. Include rest days in your training schedule. Listen to your body. Do not overtrain. Get adequate sleep.
Realistic Expectations
The goal of training is to make the trek enjoyable, not just survivable. Proper preparation allows you to appreciate the mountains rather than suffer through each day. Start training as early as possible. The more prepared you are, the more you will enjoy the experience.
How Itinerary Length Changes the Difficulty
The duration you choose significantly affects how difficult the Mardi Himal trek feels. The same trail can feel punishing or comfortable depending on how it is divided across days.
4-Day Itinerary: Compressed and Demanding
Walking Pressure: High
Recovery: Minimal
Altitude Progression: Rapid (increased risk)
Flexibility: None
Beginner Suitability: Not recommended
Weather Flexibility: None
Who it suits: Experienced trekkers with excellent fitness and limited time.
Why it feels harder:
-
Day 1 combines what the 5-day itinerary spreads across two days
-
Day 2 gains 1,060 meters in a single day
-
Day 3 combines sunrise climb with full descent (8+ hours)
-
No buffer for weather, fatigue, or altitude issues
-
Higher altitude sickness risk due to rapid ascent
5-Day Itinerary: Standard and Balanced
Walking Pressure: Moderate
Recovery: Adequate
Altitude Progression: Safe
Flexibility: Limited
Beginner Suitability: Good with preparation
Weather Flexibility: Limited
Who it suits: Most trekkers with reasonable fitness.
Why it feels manageable:
-
Day 2 is short, providing recovery after Day 1
-
Altitude progression follows recommended guidelines
-
Day 4 is long but manageable with proper acclimatization
-
Good balance of walking and rest
6-Day Itinerary: Comfortable and Beginner-Friendly
Walking Pressure: Low
Recovery: Good
Altitude Progression: Gradual (safest)
Flexibility: Good
Beginner Suitability: Excellent
Weather Flexibility: Some buffer
Who it suits: Beginners, older trekkers, photography enthusiasts, comfort-seekers.
Why it feels easier:
-
Day 1 is very short (1-1.5 hours to Australian Camp)
-
No single day exceeds 6 hours of walking
-
Rest afternoon at High Camp after sunrise
-
Better acclimatization with gradual progression
-
More time to enjoy views and rest
Merriment Treks Recommendation
For most trekkers, the 5-day itinerary provides the best balance of experience quality and time efficiency. The 6-day option is excellent for beginners or those wanting comfort. The 4-day option should be reserved for experienced trekkers with time constraints.
Seasonal Difficulty: When Mardi Himal Feels Harder
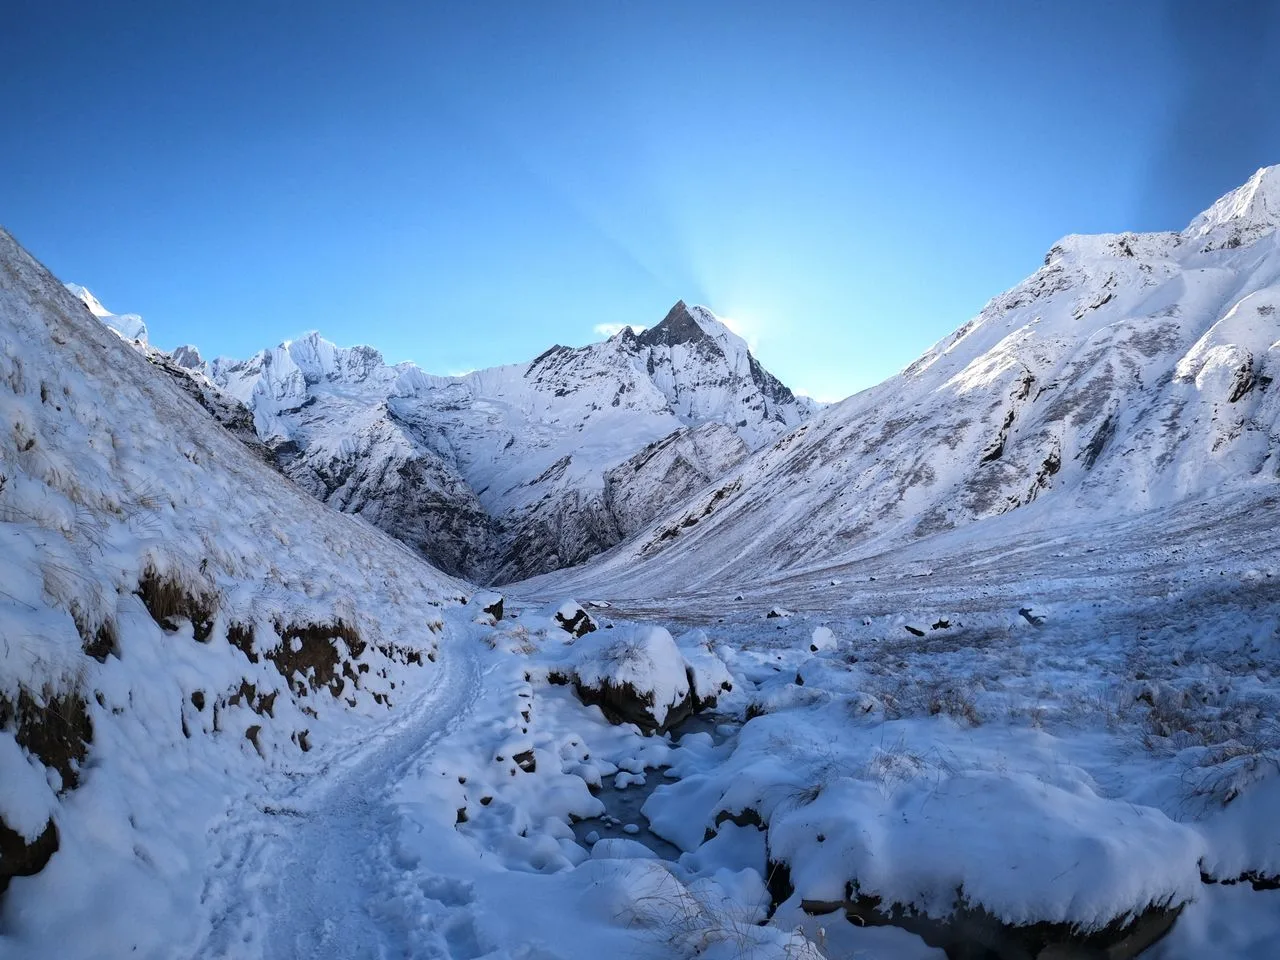
The difficulty of the Mardi Himal trek changes with the seasons. Understanding these variations helps you choose the right time for your trek and prepare appropriately.
Spring (March-May)
Difficulty Factors:
-
Moderate temperatures during day
-
Cold mornings at High Camp
-
Possible rain in late spring
-
Rhododendron blooms add beauty
-
Afternoon clouds may reduce visibility
Trail Conditions: Generally good, some mud after rain
Overall Difficulty: Moderate
Key Challenges: Afternoon clouds, occasional rain, cold mornings at altitude
Summer/Monsoon (June-August)
Difficulty Factors:
-
Heavy rain possible
-
Muddy trails
-
Slippery conditions
-
Leeches in lower forest sections
-
Poor visibility
-
Higher humidity
Trail Conditions: Muddy, slippery, challenging
Overall Difficulty: Higher than other seasons due to trail conditions
Key Challenges: Slippery trails, leeches, poor visibility, mud
Merriment Treks Note: We do not recommend monsoon season for Mardi Himal trekking.
Autumn (September-November)
Difficulty Factors:
-
Stable weather
-
Clear skies
-
Moderate temperatures
-
Cold nights at High Camp
-
Excellent visibility
Trail Conditions: Dry, well-maintained
Overall Difficulty: Moderate (easiest season for trail conditions)
Key Challenges: Cold nights, popular season crowds
Winter (December-February)
Difficulty Factors:
-
Very cold temperatures
-
Snow possible above 3,000 meters
-
Icy sections near High Camp
-
Shorter daylight hours
-
Clear skies with excellent visibility
Trail Conditions: Cold, possibly snowy/icy above 3,000 meters
Overall Difficulty: Higher due to cold and potential snow
Key Challenges: Extreme cold, icy trails, snow, shorter days
Merriment Treks Note: Winter trekking is possible but requires proper gear and experience with cold conditions.
Mardi Himal vs Poon Hill, ABC, and EBC: Honest Difficulty Comparison
Comparing the Mardi Himal trek with other popular Nepal treks helps you understand where it falls on the difficulty spectrum.
Mardi Himal vs Poon Hill
| Factor | Mardi Himal | Poon Hill |
|---|---|---|
| Maximum Sleeping Altitude | 3,580m | 2,870m |
| Maximum Viewpoint Altitude | 4,200m | 3,210m |
| Typical Duration | 4-5 days | 3-4 days |
| Daily Walking Hours | 3-8 hours | 4-6 hours |
| Descent Difficulty | Long, steep descent | Moderate descent |
| Altitude Risk | Moderate | Low |
| Technical Difficulty | None | None |
Honest Assessment: The Mardi Himal trek is generally more physically demanding than Poon Hill due to higher altitudes, steeper terrain, and the long descent to Siding. However, both treks are accessible to trekkers with reasonable fitness.
Mardi Himal vs Annapurna Base Camp
| Factor | Mardi Himal | Annapurna Base Camp |
|---|---|---|
| Maximum Sleeping Altitude | 3,580m | 4,130m |
| Maximum Viewpoint Altitude | 4,200m | 4,130m |
| Typical Duration | 4-5 days | 7-10 days |
| Daily Walking Hours | 3-8 hours | 5-7 hours |
| Descent Difficulty | Long, steep descent | Moderate descent |
| Altitude Risk | Moderate | Higher |
| Technical Difficulty | None | None |
Honest Assessment: Annapurna Base Camp is generally more difficult than Mardi Himal due to longer duration, higher sleeping altitude, and more consecutive trekking days. However, the Mardi Himal descent to Siding is steeper than most ABC descents.
Mardi Himal vs Everest Base Camp
| Factor | Mardi Himal | Everest Base Camp |
|---|---|---|
| Maximum Sleeping Altitude | 3,580m | 5,364m |
| Maximum Viewpoint Altitude | 4,200m | 5,545m |
| Typical Duration | 4-5 days | 12-14 days |
| Daily Walking Hours | 3-8 hours | 4-7 hours |
| Descent Difficulty | Long, steep descent | Long descent |
| Altitude Risk | Moderate | High |
| Technical Difficulty | None | None |
Honest Assessment: Everest Base Camp is significantly more difficult than Mardi Himal due to much higher altitudes, longer duration, and greater altitude sickness risk. The Mardi Himal trek is an excellent “first Himalayan trek” while EBC requires serious preparation.
What Trekkers Commonly Underestimate About the Mardi Himal Trek
Merriment Treks has observed several common underestimations that affect trekker experience. Understanding these in advance helps you prepare properly.
1. Downhill Fatigue
Many trekkers focus on uphill preparation and neglect downhill training. The descent from High Camp to Siding involves over 1,800 meters of elevation loss. This is often harder on knees and quadriceps than any uphill section.
2. Early-Morning Viewpoint Climb
Waking at 4:00 AM to climb to Upper Viewpoint in darkness is psychologically and physically challenging. The cold, the darkness, and the altitude combine to make this feel harder than the numbers suggest.
3. Cold at Higher Elevations
High Camp is cold, and the pre-dawn climb to Upper Viewpoint is colder. Trekkers who pack for “normal” temperatures are often unprepared for the cold at 3,580 meters and above.
4. Repeated Stairs
Stone steps are common on Nepal trekking trails. While each individual step is manageable, hours of repeated stepping create cumulative fatigue and joint strain.
5. Consecutive Trekking Days
Walking for 4-5 consecutive days is fundamentally different from day hiking. Cumulative fatigue builds, and later days feel harder than earlier days even when the terrain is similar.
6. Inappropriate Footwear
Worn-out shoes, new boots that are not broken in, or footwear without proper ankle support cause blisters, falls, and discomfort. Properly broken-in trekking boots are essential.
7. Carrying Too Much
Overpacking creates unnecessary weight that makes every step harder. Trekkers should carry only essentials and consider hiring a porter if needed.
8. Walking Too Fast
Starting too fast on Day 1 leads to early fatigue and increased altitude symptoms. Proper pacing is a skill that most inexperienced trekkers lack.
9. Underestimating Weather
Weather can change rapidly in the mountains. Rain, wind, and cold can arrive unexpectedly. Proper layers and waterproof gear are essential.
10. Confusing Short Duration with Easy Difficulty
Some trekkers assume that because the Mardi Himal trek is “short,” it must be easy. The short duration does not eliminate the physical demands of steep terrain, altitude, and long descents.
How to Make the Mardi Himal Trek Easier: Practical Tips
These practical tips from Merriment Treks will help reduce the difficulty of your Mardi Himal trek and improve your overall experience.
1. Choose the Right Itinerary
The most important decision is choosing an appropriate itinerary duration. If you are a beginner or concerned about difficulty, choose the 6-day itinerary. The extra day makes a significant difference in comfort and enjoyment.
2. Hire a Porter
If you are concerned about carrying weight, hire a porter. The cost is modest, and the improvement in comfort is substantial. Carrying only a small daypack makes the trek significantly easier.
3. Use Trekking Poles
Trekking poles are essential for this trek, especially for the descent to Siding. They reduce strain on knees, provide stability on uneven terrain, and help with balance on steep sections.
4. Walk Slowly
The pace should allow conversation. If you cannot talk while walking, you are walking too fast. Slow and steady is the strategy for Himalayan trekking.
5. Stay Hydrated
Drink 3-4 liters of water daily. Proper hydration improves energy levels, reduces altitude symptoms, and aids recovery.
6. Eat Regularly
Even if your appetite is reduced at altitude, eat regular meals. Your body needs fuel for the physical demands of trekking.
7. Bring Proper Layers
Temperatures vary dramatically between daytime walking and pre-dawn viewpoint climbs. Layered clothing allows you to adjust to changing conditions.
8. Break In Your Boots
Before the trek, break in your trekking boots thoroughly. Blisters can ruin a trek, and proper footwear prevents this.
9. Communicate with Your Guide
Your guide is your most valuable resource. Communicate your fitness level, concerns, and symptoms honestly. Your guide can adjust pacing and make recommendations.
10. Build Weather Flexibility
If possible, choose an itinerary with some weather flexibility. The 6-day itinerary provides more buffer than the 5-day option.
11. Consider a Private Trek
If you are concerned about group pacing, consider a private trek. This allows personalized pacing and more flexibility.
12. Prepare Mentally
Mental preparation is as important as physical preparation. Understand that some days will be hard. Accept that fatigue is normal. Focus on the experience rather than the discomfort.
Frequently Asked Questions About Mardi Himal Trek Difficulty
1. Is Mardi Himal trek difficult?
The Mardi Himal trek is moderately difficult, requiring reasonable cardiovascular fitness and leg strength but no technical climbing skills. The main challenges are sustained uphill walking, the pre-dawn climb to Upper Viewpoint at 4,200 meters, and the long descent to Siding. Most reasonably fit individuals who prepare properly can complete this trek.
2. Can beginners do Mardi Himal trek?
Yes, beginners with reasonable fitness and proper preparation can complete the Mardi Himal trek, especially on the 6-day itinerary. This trek is one of the best options for first-time Himalayan trekkers. The 6-day itinerary provides shorter daily walking hours and better acclimatization.
3. How fit do I need to be for Mardi Himal?
You need reasonable cardiovascular fitness and leg strength. You should be able to walk briskly for 60+ minutes without stopping, climb 20+ flights of stairs without becoming breathless, and walk downhill without significant knee pain. Regular exercise 3+ times per week is a good indicator of readiness.
4. What is the hardest part of Mardi Himal trek?
The hardest part is the combination of the pre-dawn climb to Upper Viewpoint and the subsequent descent to Siding on the same day. This involves waking at 4:00 AM, climbing 620 meters to the viewpoint, and then descending over 1,800 meters to Siding. Total walking time is 6-8 hours.
5. How many hours do you walk each day on Mardi Himal?
Daily walking times range from 3 to 8 hours depending on the itinerary and the specific day. The shortest day is 3-4 hours (Forest Camp to Low Camp). The longest day is 6-8 hours (High Camp to Upper Viewpoint to Siding).
6. Is Mardi Himal harder than Poon Hill?
Yes, the Mardi Himal trek is generally more physically demanding than Poon Hill. Mardi Himal reaches higher altitudes (4,200m vs 3,210m at viewpoints), has steeper terrain, and includes a long, steep descent to Siding. However, both treks are accessible to trekkers with reasonable fitness.
7. Is Mardi Himal harder than Annapurna Base Camp?
No, Annapurna Base Camp is generally more difficult than Mardi Himal. ABC requires more days (7-10 vs 4-5), reaches higher sleeping altitudes (4,130m vs 3,580m), and involves more consecutive trekking days. However, the Mardi Himal descent to Siding is steeper than most ABC descents.
8. Is Mardi Himal harder than Everest Base Camp?
No, Everest Base Camp is significantly more difficult than Mardi Himal. EBC reaches much higher altitudes (5,364m sleeping vs 3,580m sleeping), requires many more days (12-14 vs 4-5), and involves greater altitude sickness risk. Mardi Himal is an excellent first Himalayan trek.
9. Does altitude make Mardi Himal difficult?
Altitude adds difficulty at High Camp (3,580m) and above. At these elevations, the air contains 60-65% of sea-level oxygen, making breathing harder and physical effort more demanding. However, the 5-day and 6-day itineraries provide proper acclimatization, reducing altitude risk.
10. Is Mardi Himal safe?
Yes, the Mardi Himal trek is generally safe when trekked with a licensed guide and proper preparation. The trail is well-defined, there are no technical sections, and the altitude is moderate. The main risks are altitude sickness, slips on uneven terrain, and weather-related issues.
11. Do I need previous trekking experience for Mardi Himal?
No, previous trekking experience is helpful but not required. The 6-day itinerary is suitable for first-time trekkers with reasonable fitness. However, some experience with day hiking and uneven terrain is beneficial.
12. How should I train for Mardi Himal?
Focus on cardiovascular endurance, leg strength, and downhill tolerance. Walk briskly 3-4 times weekly, climb stairs regularly, practice hiking on hills, and include strength training for legs and core. Start training at least 8 weeks before your trek.
13. Is Mardi Himal difficult in winter?
Yes, winter trekking is more difficult due to cold temperatures, possible snow, and icy trails above 3,000 meters. Winter requires proper gear and experience with cold conditions. The clear skies provide excellent views, but the cold adds significant challenge.
14. Is the 4-day itinerary too difficult?
The 4-day itinerary is too difficult for most trekkers. It compresses the trek into three full trekking days, creating long days (7-9 hours), rapid altitude gain, and no weather buffer. Merriment Treks does not recommend the 4-day option for most trekkers.
15. What is the easiest way to trek Mardi Himal?
The easiest way to trek Mardi Himal is to choose the 6-day itinerary, hire a porter for your main bag, use trekking poles, walk slowly, and trek during autumn (October-November) when trail conditions are optimal. The 6-day itinerary provides the most comfortable pacing and best acclimatization