Introduction to Three Passes Trek Nepal
The three passes trek Nepal route sends you over Kongma La, Cho La and Renjo La, three high passes in the Khumbu that each rise above 5,300 metres, and links Everest Base Camp with the Gokyo Lakes in a single loop. If you want the Everest region without walking the same trail up and back, this is the trek that does it. It is also long, cold at the top and unforgiving if you rush. Most itineraries take 17 to 22 days, and the trekkers who finish happily are usually the ones who built in rest days and respected the altitude.
This guide explains how the Everest Three Passes Trek works, which direction to walk it, what each pass is like, how hard it really is, when to go, what it costs and what to ask before you book.
Three Passes Trek Nepal at a Glance
Before the detail, here are the numbers most people want first. Pass heights differ by a few dozen metres between sources, so treat them as approximate.
| Detail | What to expect |
|---|---|
| Region | Khumbu, inside Sagarmatha National Park |
| The three passes | Kongma La about 5,535 m, Cho La about 5,420 m, Renjo La about 5,360 m |
| Highest point usually reached | Kala Patthar, about 5,643 m |
| Typical length | 17 to 22 days, normally Lukla to Lukla |
| Best seasons | March to May and autumn (late September to November) |
| Difficulty | Strenuous, with several long days above 5,000 m |
| Accommodation | Teahouses along the route |
One pass is not enough for some people, and this trek gives you three of them, plus the Gokyo Lakes, Gokyo Ri, Everest Base Camp and Kala Patthar if you include the optional extras. That is why it is often called the ultimate Everest region trek, and also why it asks far more of your legs and lungs than the standard route.
What Makes the Everest Three High Passes Trek Different
The classic Everest Base Camp trek is an out-and-back walk. You climb up the valley, stand at base camp, climb Kala Patthar for the view and walk the same trail down. It is a wonderful trek, but on busy days the trail feels like a procession.
The three high passes route is a circuit. You use several valleys, cross between them over glaciated saddles and spend most of your time away from the main EBC conveyor belt. You still meet the crowds around Namche Bazaar and on the stretch to Lobuche and Gorak Shep, but the Chhukhung, Gokyo and Thame sections are noticeably quieter.
The price of that variety is difficulty. You gain and lose altitude repeatedly, sleep high for many nights and finish with a descent through villages that look different from the ones you passed on the way up. If you have not yet read how the standard route works, our Everest Base Camp trek guide covers the shared lower half of the trail, including the itinerary logic, permits and what the days feel like.
The Route: Four Valleys, One Loop
From Lukla you follow the Dudh Koshi valley north to Namche Bazaar, the main Sherpa trading town and your first acclimatization stop. From there the trail climbs to the monastery at Tengboche and continues to Dingboche in the Imja valley. A side trip to Chhukhung puts you at the foot of the first pass.
Kongma La takes you across into the Khumbu valley near Lobuche. From Lobuche you walk up to Gorak Shep, visit Everest Base Camp and, if conditions allow, climb Kala Patthar for the best close view of Everest. The trail then bends to Dzongla, the base for Cho La.
Cho La drops you toward the Gokyo valley, where a chain of turquoise glacial lakes sits below Cho Oyu. Gokyo Lake is listed on the Ramsar list of wetlands of international importance, which gives you a sense of how special this valley is. Gokyo Ri, a short but steep climb above the lakes, rewards you with one of the best panoramas in Nepal.
The last pass, Renjo La, leads west to Lungden and then down the Thame valley to Namche and back to Lukla. In effect, the route connects the Imja, Khumbu, Gokyo and Thame valleys into one loop.
Highlights You Will Remember
The passes are the headline, but the stops between them are what stay with you after you get home. A few are worth planning your days around.
- Everest Base Camp (about 5,364 m). The glacier, the prayer flags and the sense of standing where expeditions begin. You cannot see the summit of Everest from the camp itself, which is why most people also climb Kala Patthar.
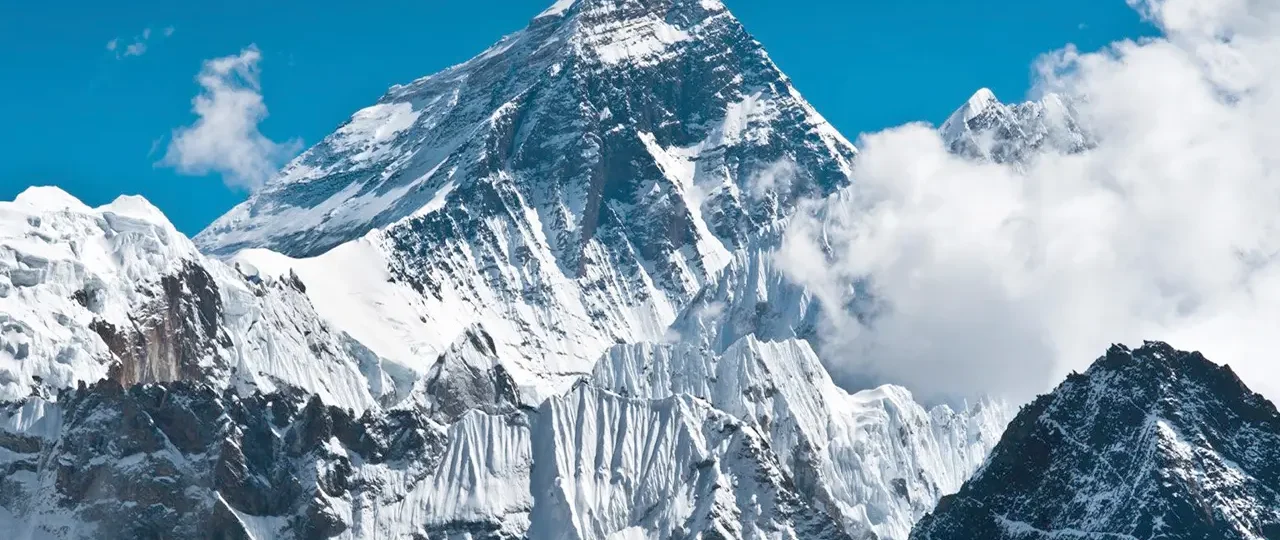
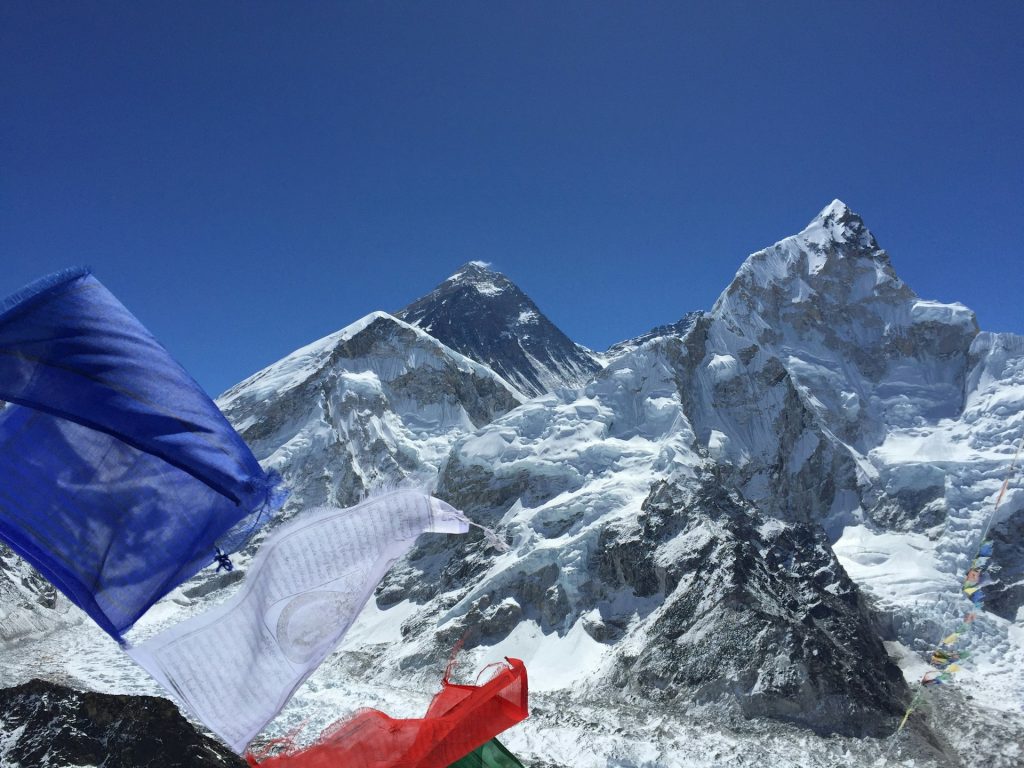
- Kala Patthar (about 5,643 m). A sunrise viewpoint above Gorak Shep with a close view of Everest, Nuptse and Lhotse. It is usually the highest point of the whole trek.
- Gokyo Ri (about 5,357 m). A steep climb above the lakes that opens onto Everest, Lhotse, Makalu and Cho Oyu. Many trekkers rate its view higher than Kala Patthar because the lakes sit directly below.
- The Gokyo Lakes. A string of glacial lakes whose colour shifts from turquoise to deep green with the light.
- Tengboche and the Thame valley. Monastery life and quiet Sherpa villages, a cultural counterpoint to all the rock and ice.
If you only have energy for one optional climb, choose the one that fits your acclimatization. A rest day with a short walk is better than a summit push that leaves you exhausted before the next pass.
Clockwise or Counter-Clockwise: Which Direction Should You Walk?
You can do the trek in either direction, and the choice changes how your body handles the altitude.
Counter-clockwise: Kongma La first
This is the more common direction. You start with Kongma La from Chhukhung, then Cho La and finally Renjo La. The main advantage is acclimatization. By the time you reach Kongma La you have already spent nights in Namche, Dingboche and Chhukhung, so the highest pass comes when your body has had time to adapt.
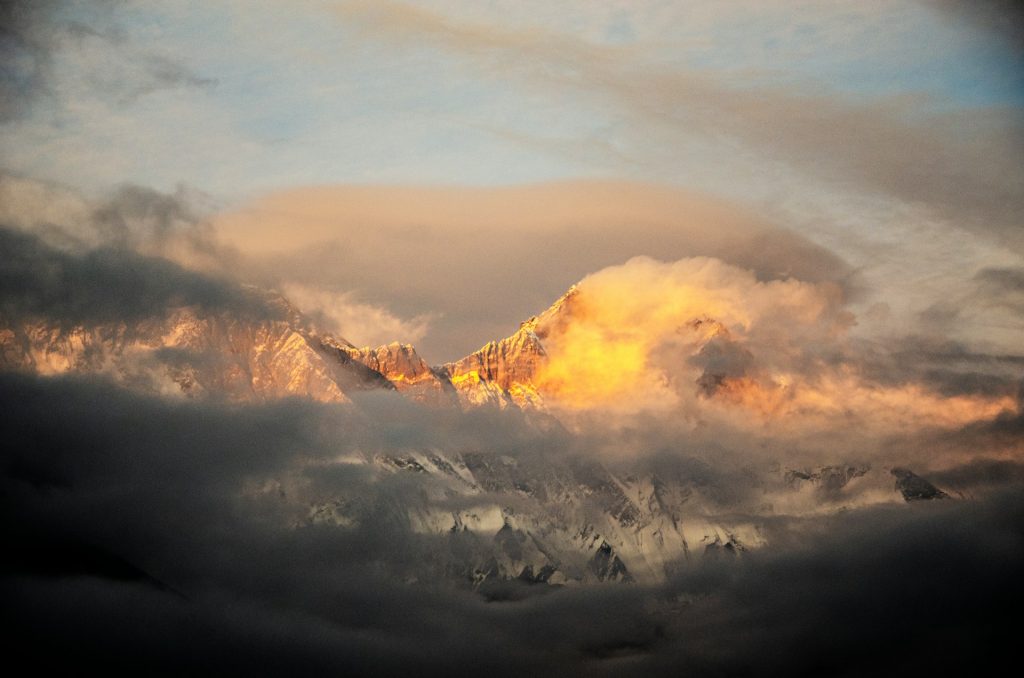
You also finish with the Renjo La view, where Everest, Lhotse, Makalu and Cho Oyu line up on the horizon with the Gokyo Lakes below. Ending with that panorama is a reward after a long trek.
Clockwise: Renjo La first
Walking clockwise, you leave Namche for Thame, cross Renjo La early and drop into Gokyo, then continue to Cho La, Everest Base Camp and Kongma La. Some trekkers like this because the Thame valley is quiet and Renjo La opens the Everest and Gokyo views early.
The drawback is that you reach the Gokyo region sooner and gain altitude faster than most acclimatization guidelines suggest. Some operators regard the clockwise direction as harder for that reason. If you choose it, ask how your itinerary handles the first nights above 4,000 metres.
For most first-timers, counter-clockwise is the safer default, but the best direction is the one with sensible rest days built in.
The Three Passes One by One
Kongma La (about 5,535 m)
Kongma La is the highest of the three and one of the longest days. You leave Chhukhung early, climb a rocky and icy slope beneath the Kongma peaks and work up through scree to the saddle. Reports describe a stone shelter near the top where trekkers rest before heading down.
The descent toward Lobuche crosses a glacier, and the views include the Nuptse wall, Pokalde and Mehra peaks. Kongma La is often described as the technical challenge of the trek, mainly because of the loose rock, ice and sheer length of the day. Start early, keep your pace slow and make sure your boots fit well.
Cho La (about 5,420 m)
Cho La connects Dzongla with the Gokyo valley. The climb from Dzongla is steady, but the far side includes a glacier section that can be icy, and trail conditions change from season to season. Operators sometimes fix ropes on the trickiest part, so ask what to expect on your dates.
Because the day from Dzongla to Gokyo is commonly quoted at seven to eight hours, many trekkers break it with a night at Thangnak. If you want to know more about the pass itself, our Cho La Pass guide looks at its terrain, season and difficulty in detail.
Renjo La (about 5,360 m)
Renjo La links Gokyo and Lungden, and many trekkers rate it the most scenic of the three. The ascent from Gokyo is steep but straightforward, and the top gives a wide view of Everest, Lhotse, Makalu and Cho Oyu, with the Gokyo Lakes shining below.
Renjo La has a long history as a trade route between the Khumbu and Tibet, used by Tibetan traders and Sherpas for centuries. You will probably cross it on a day of seven to eight hours, ending at Lungden.
Which pass is hardest?
Sources disagree, and that is worth knowing. Kongma La is the highest and longest. Cho La has the glacier. Renjo La is often called the easiest, though some trekkers find its steep stone steps tougher than they expected. In practice the hardest pass is the one you cross on a bad day, so build buffer time into your plan.
Sample Three Passes Trek Itinerary (20 Days)
Real itineraries vary, but this counter-clockwise outline shows the usual rhythm. Treat the altitudes as approximate and ask your operator for their exact plan.
| Day | Route | Notes |
|---|---|---|
| 1 | Arrive in Kathmandu | Gear check and trip briefing |
| 2 | Fly to Lukla, trek to Phakding | Short first day (Lukla is about 2,860 m) |
| 3 | Phakding to Namche Bazaar | Steep final climb (about 3,440 m) |
| 4 | Acclimatization in Namche | Day hike high, sleep low |
| 5 | Namche to Tengboche | Monastery and views of Ama Dablam |
| 6 | Tengboche to Dingboche | Enter the Imja valley (about 4,410 m) |
| 7 | Acclimatization in Dingboche | Rest or short ridge hike |
| 8 | Dingboche to Chhukhung | About 4,730 m, base for Kongma La |
| 9 | Chhukhung to Lobuche via Kongma La | Long day; Lobuche is about 4,910 m |
| 10 | Lobuche to Gorak Shep and Everest Base Camp | Return to Gorak Shep for the night |
| 11 | Kala Patthar, then to Dzongla | Sunrise viewpoint, then descend |
| 12 | Dzongla to Gokyo via Cho La | Long glacier day, or stop at Thangnak |
| 13 | Gokyo Ri and the lakes | Rest or viewpoint day |
| 14 | Gokyo to Lungden via Renjo La | Last pass |
| 15 | Lungden to Thame | Descend through the Thame valley |
| 16 | Thame to Namche Bazaar | Back on the main trail |
| 17 | Namche to Lukla | Final trekking day |
| 18 | Fly to Kathmandu | Weather permitting |
| 19 to 20 | Buffer days | For flight delays or pass weather |
Notice that the sleeping altitude rises slowly in the first half and that there are two proper rest days before Kongma La. Itineraries that squeeze the trek into 14 or 15 days usually remove exactly those rest days, which is a risk you should avoid.
How Difficult Is the Everest Three Passes Trek?
Honestly, it is hard. One operator rates it four out of five on a strenuous scale, and that matches what most guides say. You do not need technical climbing skills for the standard route, but you do need fitness, patience and a willingness to be uncomfortable.
The difficulty comes from a few things stacking up:
- Long pass days. Crossing days commonly last seven to eight hours or longer, often starting before sunrise.
- Sustained altitude. You spend many nights above 4,000 metres and several above 4,800 metres.
- Cold and wind. Early starts on the passes are cold even in good seasons, and weather can turn quickly.
- Loose and icy ground. Scree, rock and glacier sections need careful footwork.
- Accumulated fatigue. By day 12 or 13, a long day feels longer than it did on day 3.
The good news is that the trek is achievable for a healthy, well-prepared walker. Many people who complete it are not elite athletes. They are people who trained for months, hired good support and walked slowly. This route rewards steady pacing far more than speed.
Altitude and Acclimatization: The Part That Decides Your Trip
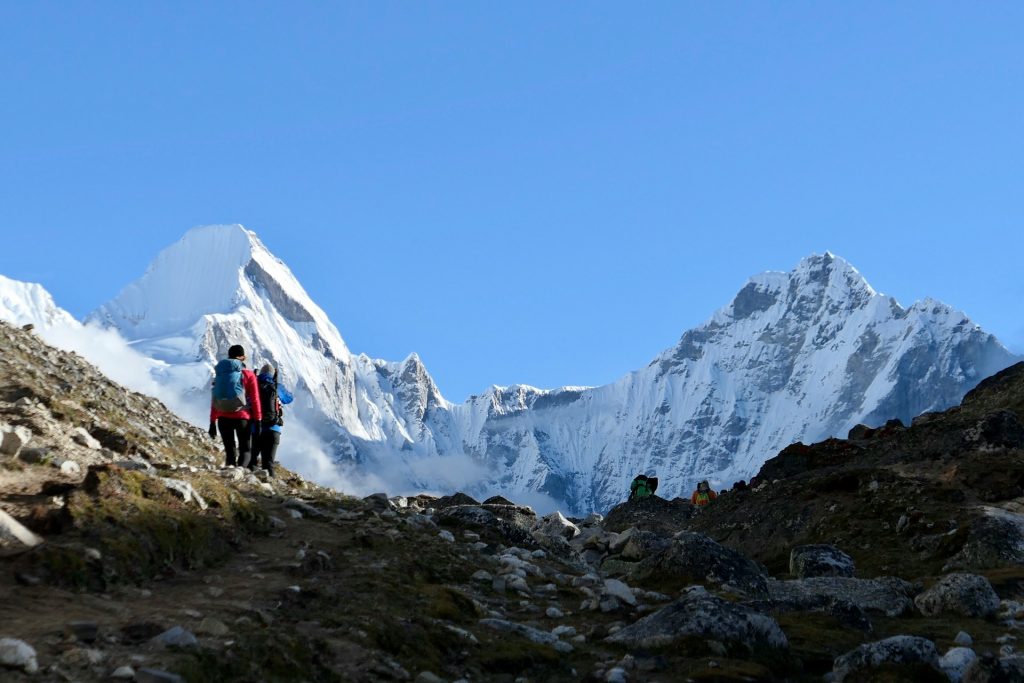
Altitude is the main reason people fail to finish this trek, not leg strength. Medical guidance for high-altitude travel is consistent: above 3,000 metres, increase your sleeping altitude by no more than about 500 metres per day and add an extra acclimatization day for every 1,000 metres of sleeping altitude you gain. The Wilderness Medical Society also recommends a rest day roughly every three to four days. You can read the details in the CDC Yellow Book chapter on altitude illness.
Dingboche is where most itineraries spend their main acclimatization days, and the way you use them matters. Hiking high during the day and returning to sleep lower is the standard approach. Our Dingboche guide explains the altitude, the acclimatization options and what to expect from the village.
Symptoms to take seriously
Mild altitude sickness usually starts with a headache, nausea, poor appetite, dizziness or unusual fatigue. The rule is simple: do not climb higher to sleep while you have symptoms. Rest, drink water and tell your guide. If symptoms worsen, descend.
Severe forms are dangerous. Confusion, loss of balance, a wet cough or breathlessness at rest need urgent descent and evacuation. UK travel health guidance sets out the same principles, including never leaving a sick person alone, and is worth reading before you go: TravelHealthPro on altitude illness.
Talk to a doctor before the trip about whether preventive medication suits you, and check that your travel insurance covers trekking to 5,500 metres and helicopter evacuation. Those two checks cost little and matter a lot.
Best Time to Do the Three Passes Trek
The best seasons are spring and autumn. Spring, from March to May, offers warmer temperatures and generally stable weather. Autumn, from roughly late September to November, usually brings clearer skies and drier trails after the monsoon.
Winter, especially January and February, brings snow on the passes and very cold nights, and Cho La in particular can be unsafe. The monsoon months of July and August bring cloud, rain and slippery trails, so most operators advise against crossing the passes then.
Whichever season you choose, weather on the passes can change fast. A flexible itinerary with buffer days is more valuable than picking the “perfect” month.
Permits, Rules and Guides
The route lies inside Sagarmatha National Park, a UNESCO World Heritage Site inscribed in 1979, so you need the park permit and the local municipality permit.
- Sagarmatha National Park entry permit: NPR 3,000 for most foreign trekkers, available in Kathmandu or at the Monjo gate. SAARC nationals pay a lower fee.
- Khumbu Pasang Lhamu Rural Municipality permit: sources report NPR 2,000 to 3,000, with some noting a rise to NPR 3,000 in 2025. It is usually issued at Lukla.
- TIMS card: not generally required in the Khumbu since the local permit replaced it, though some packages still mention it. Check with your agency.
Fees change, so confirm them before you travel. Our EBC trek permit guide walks through the same Everest region permits and where to collect them. You can also learn more about the park on the UNESCO World Heritage listing for Sagarmatha National Park.
Do you need a guide?
Rules about guides for foreign trekkers have shifted in recent years, and published sources disagree on how they apply in the Khumbu. Some say a guide is not legally required there, others say it is mandatory or effectively required. Ask a registered agency for the current position.
Legal status aside, a guide is strongly advised on this route. The passes involve glacier sections, shifting snow and altitude decisions that are much easier with an experienced local, and a recent solo accident near Lobuche showed how quickly help becomes complicated far from a road.
Three Passes Trek Cost: What You Will Actually Spend
The three passes trek Nepal route costs more than a standard Everest Base Camp trek because you spend more days on the trail. More days mean more teahouse nights, more meals, more guide and porter days and a bigger permit and insurance bill. Quoted prices vary widely, so treat any single number with caution.
The main costs are:
- Flights. Lukla flights are commonly quoted at roughly US$160 to US$250 one way, with helicopter options costing considerably more.
- Guide and porter. A guide often costs about US$25 to US$40 per day and a porter about US$15 to US$25 per day, depending on who you hire and how.
- Food and lodging. Meals cost more as you climb, and teahouse rooms are cheap but basic. Many trekkers budget several hundred dollars for the full trek.
- Permits. The two Everest region permits add up to several thousand rupees per person.
- Insurance and gear. Insurance with high-altitude and evacuation cover is essential, and you may need to rent or buy equipment.
As a rough guide, budget independent trips are often quoted around US$1,000 to US$1,800, while guided trips with a porter and full logistics commonly run from about US$2,000 to US$3,500 or more. Package prices range from the low thousands to well above that for private or higher-comfort trips.
Cheaper is not always better. A very low quote usually means fewer rest days, larger groups or less experienced staff, and those are the things that matter on this trek.
Accommodation, Food and Life on the Trail
You sleep in teahouses, simple lodges run by local families. Rooms are basic, usually with twin beds and thin walls, and bathrooms are shared in many places. The dining room is the warm room, so most people spend evenings there.
Food is simple and filling. Dal bhat, the Nepali rice and lentil meal, is a favourite because it is cheap, available everywhere and comes with refills in many lodges. Menus also offer noodles, soups, eggs and pasta. Prices rise with altitude because everything is carried up by porter or animal.
Carry Nepali rupees in cash. Outside Lukla and Namche, cards and ATMs are unreliable or absent. Charging devices, hot showers and wifi usually cost extra and may be limited at the highest stops. Drink plenty of boiled or treated water, and avoid alcohol in the first couple of days at altitude.
Trekking Responsibly in the Khumbu
The Khumbu is both a World Heritage park and a living Sherpa homeland, and a busy trekking season puts real pressure on it. A few habits make a difference.
Carry out what you can, especially batteries, plastic and hygiene items, and refill a treated bottle instead of buying plastic. Walk on the left side of trails and step aside for yaks and porters on the uphill side, since a loaded animal cannot easily stop. Ask before photographing people or monastery interiors, and spin prayer wheels clockwise as locals do.
Pay your guide and porter fairly, and choose operators who provide proper clothing and insurance for their staff. A trek that treats its crew well is almost always a better trek for you too.
Packing and Gear for the Three High Passes
Your kit needs to handle warm valley days, freezing mornings and wind on the passes. A layering system works better than one heavy jacket: a base layer, an insulating mid layer, a warm down jacket and a waterproof shell.
Footwear matters more than anything else. Choose sturdy, broken-in boots with ankle support and warm socks, and carry a second pair of lighter shoes for the evenings. Trekking poles help a lot on scree and long descents.
You will also want a warm sleeping bag suited to cold teahouse rooms, sun protection (hat, glasses with strong UV cover and sunscreen), gloves and a warm hat, a headlamp for pre-dawn starts, and a first-aid kit with your own medication. Ask your operator whether they supply or recommend traction devices for icy sections of Cho La and Kongma La.
For the full list of what to bring on the lower Everest trail, our Everest Base Camp trek gear packing list is a good checklist to start from, and you can add extra warmth and traction for the passes.
Is This Trek Right for You?
The Everest Three Passes Trek suits people who already enjoy multi-day walking and have some experience sleeping at altitude. If you have completed a trek such as Everest Base Camp, Annapurna Base Camp or a similar route without trouble, you have a useful reference point for how your body behaves up high.
If this would be your first big trek, think carefully. A shorter high-altitude route is a gentler way to learn how you cope with thin air and basic lodges, and you can return for the passes later. That is not a failure. It is how many experienced trekkers build up to this one.
You should also be honest about your schedule. The passes depend on weather, and a rigid timetable leaves no room for a bad day. If you have a history of altitude illness, a heart or lung condition or any medical concern, speak to a doctor who knows high-altitude travel before you commit.
How to Train Before You Go
Start months ahead, not weeks. The goal is stamina, not speed. Long hikes with a loaded daypack, repeated on consecutive days, are the best preparation because they mimic the accumulated fatigue of the real trek.
Add stair climbing or hill repeats for your legs, and cardio sessions such as cycling, swimming or running for your heart and lungs. Strengthen your core and calves, and practise walking downhill, because long descents tire the knees. If you can walk six to eight hours with a pack over varied terrain and feel fine the next morning, you are close to ready.
Training will not remove altitude risk, since fitness does not guarantee acclimatization. It does make the long days easier and leaves you with energy to enjoy the scenery.
Choosing an Operator, Guide and Porter
A good operator makes this trek safer and more enjoyable. Before you pay a deposit, ask questions that reveal how the trip will actually run:
- How many acclimatization days are built in, and where?
- Is there a buffer for weather and flight delays?
- Which direction does the itinerary follow, and why?
- Are the guides licensed, first-aid trained and experienced on all three passes?
- What is the emergency and evacuation procedure, and who pays?
- What is included in the price and what is not (flights, permits, meals, equipment)?
- How are porters treated, and what load limits apply?
- What is the group size?
The answers tell you far more than a price list. Operators who are vague about acclimatization or evacuation are a warning sign.
Common Mistakes to Avoid
Most problems on this trek come from avoidable choices.
- Compressing the itinerary. Cutting rest days to save money is the most common error.
- Ignoring early altitude symptoms. A mild headache is information, not an inconvenience.
- Underpacking warmth. Mornings on the passes are far colder than the valley.
- Starting late on pass days. Early starts reduce wind exposure and leave margin for the descent.
- Wearing new boots. Blisters on day 6 can end a trek.
- Skipping buffer days. Flights from Lukla are weather-dependent and delays are normal.
- Travelling in the wrong season. Winter and monsoon conditions on the passes can be genuinely dangerous.
- Treating the pass heights as exact. Heights vary by source, so do not plan around a single number.
Frequently Asked Questions about Three Passes Trek Nepal
1. How many days does the Everest Three Passes Trek take?
Most itineraries run between 17 and 22 days from Lukla back to Lukla. A realistic plan is about 18 trekking days plus one or two buffer days for weather and flight delays.
2. Which direction is better, clockwise or counter-clockwise?
Counter-clockwise, starting with Kongma La from Chhukhung, is the more common choice because it gives you more acclimatization before the highest pass. Clockwise is possible, but some operators consider it harder because you reach the Gokyo side sooner.
3. How difficult is the Everest Three Passes Trek?
It is a strenuous trek. You walk six to eight hours or more on pass days, sleep above 4,000 metres for many nights and deal with cold and changeable weather. Technical climbing skills are not usually required.
4. Which of the three passes is the hardest?
Sources disagree. Kongma La is the highest and one of the longest days, while Cho La can be the most demanding when its glacier section is icy. Renjo La is often described as the gentlest, but all three are high-altitude days.
5. What is the best time for the Three Passes Trek?
Spring (March to May) and autumn (about late September to November) are the best seasons. Winter and the monsoon are generally not advised because of snow on Cho La and poor visibility. For a month-by-month view of the main Everest trail, see our best time to trek Everest Base Camp guide.
6. Do I need a guide for the Three Passes Trek?
Guide rules for the Everest region have changed in recent years and sources disagree on how they apply, so confirm the current rule with a registered agency. Regardless of the law, a licensed guide is strongly recommended because of the glacier sections and altitude risk.
7. What permits do I need?
You need the Sagarmatha National Park entry permit (NPR 3,000 for most foreign trekkers) and the Khumbu Pasang Lhamu Rural Municipality permit (reported at NPR 2,000 to 3,000). TIMS has not generally been required in the Khumbu since 2018. Confirm current fees before you travel.
8. How much does the Three Passes Trek cost?
Quoted totals vary widely, from roughly US$1,000 to US$1,800 for a budget independent trip to US$2,000 to US$3,500 or more with a guide, porter and logistics. Lukla flights, permits, food, lodging and insurance are the main costs.
9. Can I do the Three Passes Trek without Everest Base Camp?
Yes. Some itineraries skip Everest Base Camp and Kala Patthar and cross the passes only, which shortens the trek. Most trekkers include them because the route passes close by.
10. What happens if I get altitude sickness on the trek?
Stop ascending, rest and tell your guide at the first symptoms. If symptoms worsen, descend. Severe symptoms such as confusion, loss of balance or breathlessness at rest need urgent descent and evacuation, so carry insurance that covers it.
Plan Your Three Passes Trek Nepal With Merriment
The Everest Three Passes Trek is one of the great journeys in the Himalaya, and it rewards careful planning more than almost any other trek in the Everest region. The right direction, enough rest days, good gear and reliable local support make the difference between a hard but happy trek and a stressful one.
If you would like help planning your Kongma La, Cho La and Renjo La crossing, the Merriment team is happy to answer your questions about dates, itinerary, difficulty and what a trip would cost for your group. Tell us when you would like to travel, how many people are coming and what experience you have, and ask for a quote.
Enquire on WhatsApp: +977 974-0262168
Message us today and start planning the Everest trek you have been thinking about.